

A leaking mini split almost always comes down to drainage or airflow, not a refrigerant failure. If water is pouring out, cut power at the breaker and check the filter and condensate drain first. Small, occasional drips usually mean a partial clog you can clear yourself. A cracked drain pan, structural damage, or anything you suspect involves refrigerant is a job for a licensed technician, not a weekend project.
TL;DR:
- Most mini split leaks originate from drainage or airflow issues rather than refrigerant failure, and DIY fixes often resolve common clogs or blockages.
- Checking and cleaning the condensate drain line, replacing a torn filter, and ensuring the unit is properly leveled can typically fix most leaks without professional help.
- Signs of a refrigerant leak or frozen coil, such as frost on the coil or warm air blowing, require professional diagnosis and cannot be fixed through simple maintenance.
- Persistent leaks after basic troubleshooting indicate installation problems or mechanical damage, which need a licensed technician for proper repair.
- Regular maintenance like filter replacement and line insulation can prevent most drain-related leaks, but complex issues demand professional assessment to avoid water damage.
Table of Contents
- What Causes Mini Split Water Leaks?
- How Do You Fix a Leaking Mini Split Yourself?
- How Do You Test if the Drain Fix Worked?
- When Should You Call a Licensed HVAC Technician?
- How Can You Prevent Future Mini Split Leaks?
- Publisher Perspective: How Encode Approaches Persistent Leaks
- What Actually Matters When a Mini Split Is Leaking
- Get Professional Help for a Mini Split Leak
- Sources
- FAQ
What Causes Mini Split Water Leaks?
The most common culprits behind a mini split leaking water are a clogged condensate drain line, a dirty air filter, frozen evaporator coils, a cracked drain pan, or a unit that was never mounted level in the first place, according to Trane's troubleshooting guidance. Each one produces a slightly different pattern, which is your best clue for diagnosing the problem before you touch anything.
- Clogged condensate drain: algae, dust, and biofilm build up inside the drain hose over time, and once the line narrows enough, condensate backs up and spills over the drain pan.
- Dirty or blocked filter: a filter packed with dust restricts airflow across the coil. The coil gets too cold, ice forms, and when the system cycles off or you run the fan, that ice melts faster than the pan can drain.
- Frozen evaporator coil: beyond a dirty filter, low refrigerant charge can also freeze the coil, since GREE's installer guide notes that restricted airflow and low refrigerant are the two leading causes of coil icing that later melts into a leak.
- Cracked drain pan or damaged hose: physical damage lets water escape before it ever reaches the drain line, often showing up as a leak that has nothing to do with clogs at all.
- Unlevel installation: if the indoor unit was mounted without a slight backward tilt toward the drain outlet, gravity works against the condensate instead of with it, and water pools inside the housing.
- Failed condensate pump: on systems that use one instead of gravity drainage, a dead or clogged pump means water has nowhere to go but out the front of the unit.
How Do You Fix a Leaking Mini Split Yourself?
Work through these steps in order. Most leaks resolve at step two or three.
- Kill the power first. Switch off the unit at the remote or wall control, then flip the breaker before you open any panel. Water and live electrical components have no business sharing space while you're working.
- Pull and inspect the filter. Slide it out, rinse it under lukewarm water, and let it air dry completely before reinstalling. If it's torn or too clogged to clean effectively, replace it. Do this regularly during humid stretches.
- Clear the drain line. Locate the drain hose where it exits the outdoor wall and use a wet/dry vacuum on the lowest setting to pull debris out from that end. Carrier's diagnostic guidance recommends this as a first move before anything more invasive. If the vacuum doesn't fully clear it, flush the line with a mix of warm water and a small amount of white vinegar, poured in from the indoor access point, then flush again with plain water. Skip harsh commercial drain cleaners; they can degrade the plastic hose over time.
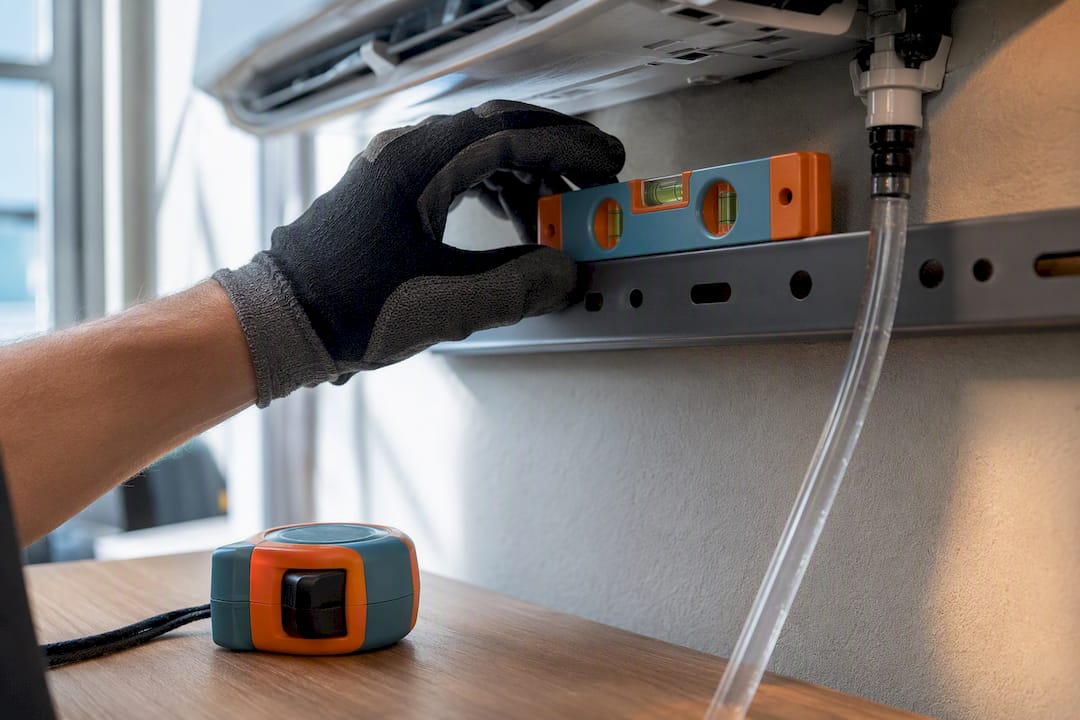
- Check the level. Use a small bubble level against the top of the indoor unit. It should tilt very slightly toward the drain side. A minor shim adjustment is a DIY fix; if the mounting bracket itself is loose or bent, that's a technician call.
- Handle a cracked hose carefully. Rubber repair tape can buy you a day or two, but a cracked or split drain hose needs full replacement, not a permanent patch. Pioneer's support documentation treats hose replacement as standard once cracking starts, since a temporary seal tends to fail again under normal condensate pressure.
- Watch for frozen coil signs. Frost on the coil, warm air blowing instead of cool, or a hissing sound near the outdoor unit point toward refrigerant, not drainage. Stop here if you see any of that.
Pro Tip: Snap a photo of your drain hose routing before you disconnect anything. If you need to call a technician later, that photo saves them a diagnostic step and saves you money on the visit.
Never attempt to add refrigerant, patch a refrigerant line, or use a can of DIY "leak sealant" in the sealed system. That work requires EPA-certified equipment and recovery procedures, and doing it yourself can damage the compressor or release refrigerant illegally.
How Do You Test if the Drain Fix Worked?
Open the front panel, remove the filters, and pour a small cup of water directly over the evaporator coil. Watch the outdoor drain outlet.
- Water exiting steadily within a few seconds means the clog is cleared.
- No flow, or water backing up inside the housing, means the blockage is still there or deeper than a vacuum can reach.
Once the pour-over test passes, reassemble the unit and run it in cooling mode for 30 to 60 minutes. Air Conditioner Lab's guidance recommends this window specifically because it's long enough to generate a realistic volume of condensate and confirm the path stays clear under normal operating conditions. Steady, continuous drainage with no drips from the vents or housing means you're done. Intermittent flow, or any water appearing where it shouldn't, means stop testing, document what you saw, and move to professional service.
When Should You Call a Licensed HVAC Technician?
Some leak causes are outside safe DIY territory no matter how mechanically confident you are.
- Any suspected refrigerant leak or low charge requires an EPA-certified technician with recovery equipment. This isn't a licensing formality; it's federal law under the Clean Air Act.
- A cracked drain pan usually means partial disassembly of the indoor unit, which risks damaging wiring or the coil if you're not familiar with the specific model.
- Electrical issues, like a tripped breaker that won't reset or a control board acting erratically alongside the leak, point to a wiring problem, not drainage.
- Visible water damage to walls, ceilings, or flooring, or a leak that returns within days of a cleaning, both signal a deeper issue than a simple clog.
When you call, have the model number (usually on a sticker inside the indoor unit's front panel), a short timeline of when the leak started and what you've already tried, and photos of the drain line and any water damage. That single piece of prep usually cuts a diagnostic visit down significantly.
How Can You Prevent Future Mini Split Leaks?
A little routine maintenance keeps most of these problems from starting in the first place.
- Clean or replace filters every two to four weeks during cooling season, more often in humid climates or homes with pets, a cadence manufacturer guidance from TOSOT supports for reducing both clogs and coil icing.
- Schedule a full professional cleaning once a year, ideally before peak cooling season, covering the coil, blower wheel, drain line, and a refrigerant charge check.
- Keep indoor humidity in check with proper ventilation. Excess moisture in the air means more condensate for the drain system to handle, which raises the odds of a slow clog turning into an overflow.
- Insulate exposed refrigerant lines and drain hoses, especially where they pass through unconditioned space, since temperature swings there can cause extra condensation on the lines themselves.
- If your drain run is unusually long or has to move water uphill at any point, ask a technician about installing or servicing a condensate pump rather than relying on gravity alone.
Publisher Perspective: How Encode Approaches Persistent Leaks
A well-established local HVAC company serving Billings, Montana notes that most mini split leak calls trace back to the same handful of causes covered above, and most get caught before they become water damage claims. Encode's mini split installation and service work puts a premium on rapid response, because a leak that sits for a week does more damage than one caught on day one.
What separates a routine visit from a bigger repair is usually how the unit was installed in the first place. A slightly unlevel mount or an undersized drain line often doesn't show symptoms for months, then fails during the first real humid stretch. Technicians frequently check mounting and drain slope on every service call, not just when a leak is the complaint, since catching that early costs far less than repairing water damage later.
What Actually Matters When a Mini Split Is Leaking
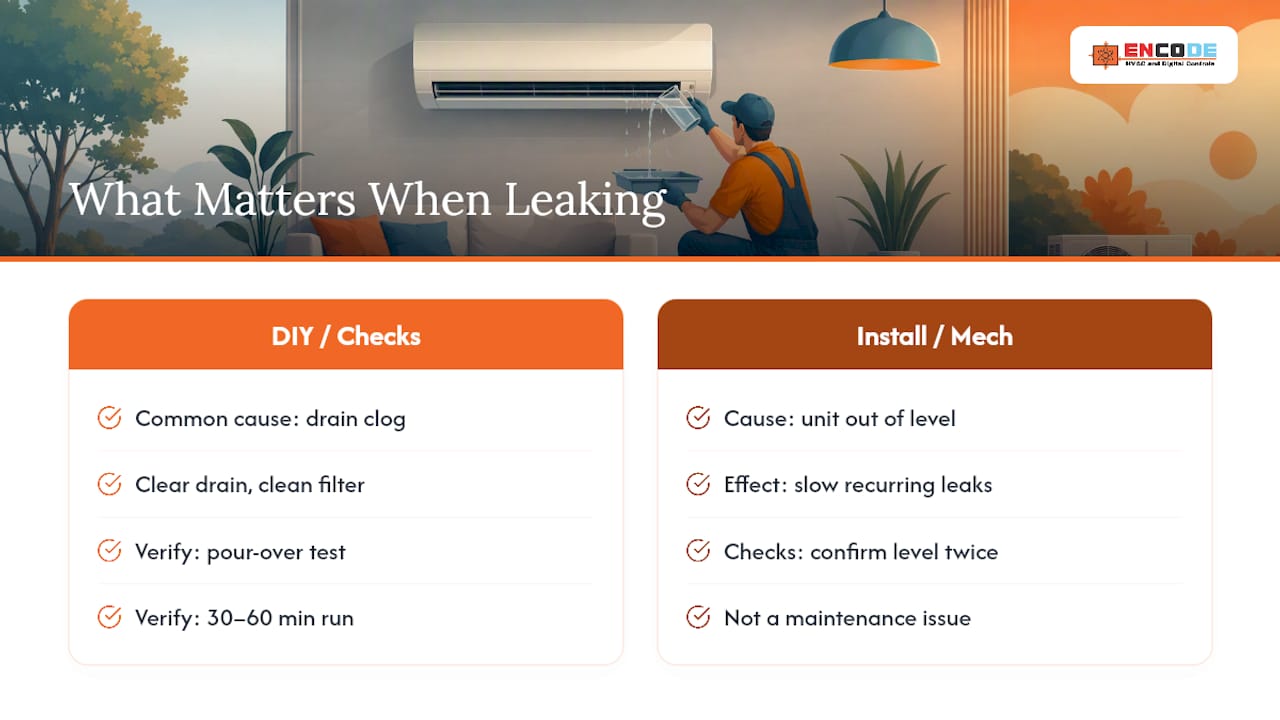
The internet is full of advice that treats every mini split leak like a drain clog. Most of the time that's right, which is exactly why the DIY steps above work for the majority of cases. But the conventional advice skips the part that actually protects your home: verification. Clearing a clog and walking away without running the pour-over test or the 30 to 60 minute cooling cycle is how a "fixed" leak comes back three weeks later, usually while nobody's watching.
The other blind spot is installation quality. A unit that's slightly out of level will keep producing slow leaks no matter how often you clean the filter, because the underlying geometry works against gravity every single cycle. If you've cleared the drain, cleaned the filter, and confirmed the level twice and water still shows up, stop treating it as a maintenance problem. It's an installation or mechanical issue, and that distinction is where DIY should end and a technician should start.
— Daniel
Get Professional Help for a Mini Split Leak
If you've worked through the filter cleaning, drain flush, and level check and the leak keeps coming back, that's a sign of something the tools in your garage can't fix. Experienced HVAC technicians typically check mounting, drain slope, and refrigerant charge together instead of guessing at a single cause. That means fewer return visits and a leak that actually stays fixed.

Refrigerant diagnosis, drain pan replacement, and internal repairs all require EPA-certified equipment, so don't attempt those steps yourself. Before you call, snap a few photos of the drain hose and any water damage, note your unit's model number, and jot down what you've already tried. It saves time on the visit and helps our team arrive with the right parts.
Ready for a technician? Visit our residential HVAC service page to schedule a repair, or check out our maintenance plans if you'd rather prevent the next leak before it starts.
Sources
This guide draws on manufacturer troubleshooting documentation from Trane, Carrier, Pioneer, and GREE, along with maintenance guidance from the U.S. Department of Energy.
- Air Conditioner Lab — Mini split condensate drain line installation
- Trane — Mini-Split Leaking Water: Causes and Solutions
- Pioneer — wall-mounted indoor unit leaking water improperly
- GREE Comfort — Why Is My Mini Split Leaking Water? Installer Guide
FAQ
How do you stop water leakage from a mini split?
Clear the condensate drain line with a wet/dry vacuum, clean or replace the filter, and check that the indoor unit is level. Then run a drainage test before assuming the fix is permanent.
Why do mini splits always seem to leak?
Mini splits generate condensate constantly during cooling, and any small restriction in the drain line or airflow path is enough to send that water somewhere other than the drain pan. It's less about the equipment failing and more about routine buildup that needs periodic clearing.
Can you still run your AC if it's leaking water?
You can run it briefly for diagnostic purposes, like a drainage test, but continuous operation with an active leak risks water damage and, in frozen-coil cases, further ice buildup. Turn the unit off and address the cause before resuming normal use.
Can you put leak sealant in a mini split?
No. Sealant products marketed for refrigerant leaks can damage the compressor and other internal components, and refrigerant repairs require an EPA-certified technician with proper recovery equipment. Condensate drain leaks call for cleaning and hose repair, not sealant of any kind.