
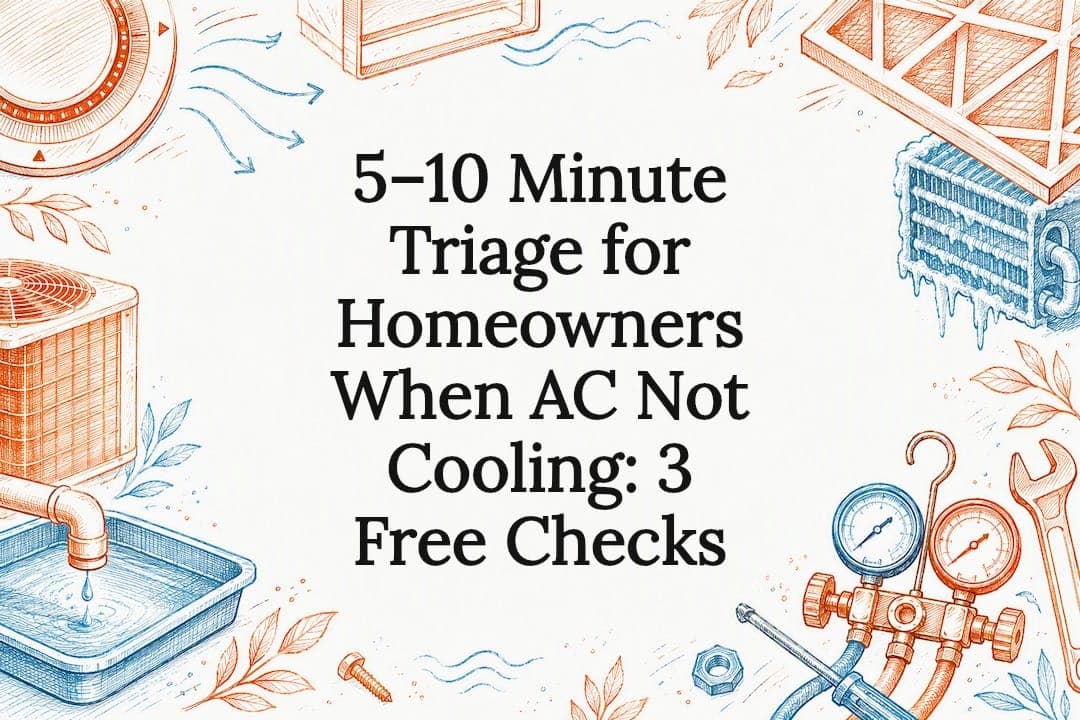
If your AC runs but won't cool, the most likely culprits are a clogged air filter, a frozen evaporator coil, a struggling outdoor condenser, low refrigerant, or a failing electrical component like a run capacitor. Start with the free checks: thermostat mode and setpoint, filter condition, and whether the outdoor unit is running normally. If you see ice on the lines, smell burning, or the breaker keeps tripping, shut the system off and call a technician.
TL;DR:
- Regularly check and replace filters every 30 days during peak season to prevent airflow restrictions that cause icing and reduced cooling efficiency.
- Verify that the thermostat is set correctly, with the fan on AUTO and the setpoint 3 to 5°F below the room temperature, to ensure proper system operation.
- Keep outdoor condenser coils clean and unobstructed, with at least two to three feet of clearance, to prevent heat rejection issues and system inefficiency.
- Address ice buildup on indoor coils immediately by turning off the system, allowing it to defrost, and fixing airflow or refrigerant issues before restarting.
- Call a certified technician for refrigerant recharge, electrical faults, or recurring problems; DIY fixes cannot reliably handle refrigerant or complex compressor repairs.
Table of Contents
- Quick Triage: Fast Checks You Can Do in 5 to 10 Minutes
- Dirty or Clogged Air Filter and Airflow Restrictions
- Thermostats, Controls, and Simple Electrical Checks
- Outdoor Condenser Problems: Dirty Coils, Blocked Airflow, and Fan Failures
- Frozen Evaporator Coil: Causes, Confirmation, and Safe Thawing
- Refrigerant Issues and Why Charging Requires a Technician
- Electrical Faults: Run Capacitors, Contactors, and Compressor Problems
- Ductwork, Vents, and System Sizing Problems
- When to Stop DIY and Call a Pro
- Impact of Insufficient Refrigerant Levels
- Effects of Thermostat Sensor Problems
- Significance of Proper Refrigerant Charge vs Overcharge
- Role of Drain Line Blockages and Condensate Issues
- Importance of Regular AC Maintenance Schedules
- Author Perspective: Quick Prioritization and Prevention
- Encode Corporation: Repair, Maintenance Plans, and How to Request Service
- Sources
Quick Triage: Fast Checks You Can Do in 5 to 10 Minutes
Before you assume the worst, run through this in the order below. It takes less time than waiting on hold with a dispatcher, and it often solves the problem outright.
- Check the thermostat. Mode should read COOL, fan should be set to AUTO, and the setpoint needs to sit 3 to 5°F below the current room temperature. A dead battery can leave the display blank or unresponsive, so swap in fresh ones if anything looks off.
- Feel for airflow at the registers. Hold your hand up to a supply vent, or use a cheap thermometer if you want a real number. Weak or absent airflow points toward a filter or duct issue rather than the outdoor unit.
- Walk outside and listen. You want to hear the compressor humming and see the fan spinning. Check that the outdoor disconnect is pushed in and the breaker hasn't tripped, and clear away any leaves, grass clippings, or debris blocking the cabinet.
If ice has formed on the refrigerant lines or you catch a burning smell anywhere near the unit, turn the system off immediately and treat it as a call-a-pro situation, not a DIY project.
Dirty or Clogged Air Filter and Airflow Restrictions
A dirty filter is the single most common reason central air not cooling calls turn out to have a cheap fix. When airflow across the indoor coil drops, the coil cannot absorb heat properly and may ice over in humid conditions, which severely reduces cooling capacity.
Most residential systems use a 1-inch filter that slides into a slot near the blower or return grille, though some homes run thicker 4 to 5 inch media filters housed in a separate cabinet. During peak cooling season, plan to check a 1-inch filter every 30 days and replace it as soon as it looks gray or matted. Media filters typically last 3 to 6 months.
- Locate the filter slot at the return air grille or directly at the air handler.
- Slide out the old filter and note the airflow arrow direction before installing the new one.
- Replace monthly during heavy-use months if you have pets or run windows open.
If register airflow is still weak after a fresh filter, or the coil starts icing again within a day, the restriction is likely downstream: closed vents, collapsed flex duct, or a blower motor issue that needs a technician's eyes.
Pro Tip: Write the installation date on the new filter with a marker. It's the fastest way to know at a glance whether you're overdue, and it takes the guesswork out of "did I already change this?"
Thermostats, Controls, and Simple Electrical Checks
A surprising number of "AC not keeping up" calls trace back to settings, not hardware. Confirm the thermostat is set to COOL, the fan is on AUTO rather than ON, and there's no eco mode or vacation schedule quietly holding the setpoint higher than you think.
- Lower the setpoint several degrees below room temperature to force a fresh call for cooling.
- Place a separate room thermometer near the thermostat for a few minutes to check its accuracy against the display.
- If the thermostat screen is frozen or unresponsive, pull the batteries for 30 seconds or flip the breaker to force a reset.
- Check the AC breaker in the electrical panel; if it's tripped, reset it once. A breaker that trips again immediately signals an electrical fault, not a fluke, and needs a technician before you try a third time.
Outdoor Condenser Problems: Dirty Coils, Blocked Airflow, and Fan Failures
The outdoor unit's entire job is rejecting the heat your indoor coil pulls out of the house. When the condenser coil is caked with dirt, cottonwood fluff, or grass clippings, or the fan can't spin freely, that heat has nowhere to go and the whole system loses efficiency even though it's technically running.
Seasonal debris is the usual offender: overgrown shrubs pressed against the cabinet, mower clippings packed into the fins, or a fence built too close for proper airflow clearance.
- Keep at least 2 to 3 feet of clearance on all sides of the outdoor unit.
- With the breaker switched off, gently hose down the coils from the inside out using a garden hose, never a pressure washer, which can bend the delicate fins.
- Visually confirm the fan blade spins freely by hand when the power is off.
- If the fan doesn't spin once power is restored, or the unit hums without the fan turning, that points to a motor or capacitor fault, not dirt.
Pro Tip: After heavy pollen season or nearby construction, coils accumulate grime faster than you'd expect. If your system has had recent work done near it, a resource like SparklePro's guide to post-construction HVAC cleaning covers safe cleaning steps for heavier contamination than a routine hose-down handles.
Frozen Evaporator Coil: Causes, Confirmation, and Safe Thawing
A block of ice on the indoor coil or the suction line is one of the most common reasons a system runs but blows warm air, and it almost always traces back to restricted airflow from a dirty filter or, less often, low refrigerant charge. Either problem drops the coil's surface temperature low enough that moisture in the air freezes onto it instead of draining away.
If you spot ice, follow this sequence:
- Turn the thermostat to OFF, but switch the fan setting to ON so it keeps circulating room-temperature air across the coil.
- Let the coil defrost fully, which usually takes 30 to 90 minutes. Never scrape the ice or point a space heater at it.
- Once it's clear, replace the filter, confirm airflow at the registers, and restart the system in COOL mode.
If ice reforms within a few hours of restarting, stop running the unit. Continued operation on a frozen coil can flood the compressor with liquid refrigerant, which is a fast track to a much more expensive repair.
Refrigerant Issues and Why Charging Requires a Technician
Low refrigerant produces a specific pattern: the system runs continuously, supply air feels only slightly cool instead of cold, and the temperature split between return and supply air narrows well below the 16 to 22°F range that indicates healthy operation. That's different from a simple airflow restriction, which usually still produces ice and a normal or even wider split at the coil itself.
Refrigerant isn't a fluid you top off like motor oil. Federal EPA regulations require certified technicians to handle refrigerant recovery, leak repair, and recharging, both for environmental reasons and because overfilling or underfilling the system causes real damage.
- A technician will typically connect manifold gauges to read suction and discharge pressures.
- UV dye or electronic leak detectors help pinpoint exactly where refrigerant is escaping.
- Repair generally means fixing the leak first, then evacuating the system and recharging to the manufacturer's specified weight, not just "adding gas" until it feels cold.
Skipping the leak repair and just recharging is a short-term patch. The refrigerant will leak out again, usually within a season.
Electrical Faults: Run Capacitors, Contactors, and Compressor Problems
When the outdoor unit hums but the fan won't spin, or you hear a rapid clicking from the contactor without the compressor kicking on, a failed run capacitor or contactor is the likely cause. The capacitor gives the compressor and fan motor the electrical push they need to start; when it weakens, the motor tries and fails, which is what produces that telltale hum.
- Repeated clicking or humming without the fan starting means don't keep flipping the breaker to "try again."
- A weak capacitor that keeps getting force-started puts extra strain on the compressor windings, and that repeated stress shortens compressor life considerably.
- Capacitor and contactor replacements are typically quick, inexpensive repairs when caught early. A failed compressor, by contrast, is one of the most expensive single repairs on a residential system and sometimes costs close to a full replacement.
Catching a bad capacitor early is the difference between a same-day fix and a multi-thousand-dollar compressor swap.
Ductwork, Vents, and System Sizing Problems
Sometimes the AC unit itself is working fine and the problem is what happens after the cold air leaves it. Leaky supply ducts, missing insulation in an attic run, or a handful of closed registers in unused rooms all bleed cooling capacity before it ever reaches the thermostat's sensor.
Walk your house and open every supply register, including ones in closets or rooms you rarely use. Closing too many vents to "save energy" actually raises static pressure and can worsen coil icing.
- Check accessible duct joints in the attic or basement for gaps you can feel air escaping from.
- Foil HVAC tape works as a temporary seal on obvious leaks; a professional duct sealing job holds up longer.
- If the system has always struggled to keep up, even with clean filters and a healthy refrigerant charge, an ACCA Manual J load calculation can confirm whether the unit is simply undersized for the square footage it's cooling.
When to Stop DIY and Call a Pro
Some signals mean it's time to put the tools down. If the coil refreezes shortly after you thaw it, if a breaker trips more than once, if you smell anything burning, or if you suspect a refrigerant leak, stop troubleshooting and call for HVAC not cooling service.
A technician works through a more thorough version of the same ordered sequence you started: confirming thermostat and airflow first, then measuring the supply and return temperature split, inspecting the outdoor unit, checking refrigerant pressures, and testing electrical components like the capacitor and contactor. Many carry a handheld infrared thermometer specifically to get that supply/return delta fast, before touching anything invasive.
- Have your system's model number ready if you can find it on the indoor or outdoor unit's data plate.
- Tell dispatch exactly which checks you already ran: filter changed, thermostat verified, ice observed or not. It shortens the diagnostic visit considerably.
- Mention any recent trips, humming, or burning smells right away since those often change what the technician brings on the truck.
Pro Tip: A technician who knows you already checked the basics can skip straight to the harder diagnostics, which usually means a faster, cheaper visit. For readers in the area, Encode Corporation's residential air conditioning services cover exactly this kind of diagnostic and repair work.
Impact of Insufficient Refrigerant Levels
Running an AC with insufficient refrigerant doesn't just mean warmer air. It changes how the entire system behaves, and rarely for the better. With less refrigerant circulating, the evaporator coil runs colder than it should, which is exactly the condition that produces ice buildup even when airflow is perfectly normal.
The compressor suffers too. Refrigerant carries a small amount of oil that lubricates the compressor's internal parts as it circulates. When the charge drops, that lubrication drops with it, and the compressor runs hotter and wears faster than it's designed to. Left unaddressed long enough, an undercharged system can shorten compressor life dramatically, turning what started as a $200 to $400 leak repair into a compressor or full system replacement.
Energy bills climb too. A low-charge system runs longer to reach the same setpoint, which shows up as higher electricity use for less actual comfort. Homeowners often notice the AC "running constantly" months before they notice it's not actually cooling well, because the system compensates by running longer cycles rather than shutting off.
The narrowed temperature split described earlier isn't just a diagnostic clue. It's a direct measurement of how much cooling capacity you've lost. A system that should drop supply air 20°F below return air but only manages 10°F is delivering roughly half its intended cooling power, even though the compressor, fan, and blower are all technically running.
Effects of Thermostat Sensor Problems
A thermostat's built-in temperature sensor is what tells the whole system when to start and stop cooling. When that sensor drifts out of calibration or gets fooled by its location, the AC can run perfectly and still leave the house feeling too warm, simply because the thermostat thinks the job is done before it actually is.
Placement causes more of these problems than actual sensor failure. A thermostat mounted in direct sunlight, near a lamp, above a floor vent, or on an exterior wall reads its immediate surroundings rather than the room as a whole. It might cut the compressor off at what it reads as 72°F while the rest of the house sits at 76°F or higher.
Older thermostats and ones with worn internal components can also drift several degrees off true over years of use. That's why placing a separate room thermometer next to the thermostat for comparison is such a useful five-minute check. If the two consistently disagree by more than 2 or 3 degrees, the thermostat itself, not the AC unit, may be the root problem.
Smart thermostats add another variable: scheduling conflicts, eco modes, or a geofencing feature that assumes nobody's home can quietly override your intended setpoint without any obvious error message. Before troubleshooting the mechanical system further, rule out the control layer sitting on your wall.
Significance of Proper Refrigerant Charge vs Overcharge
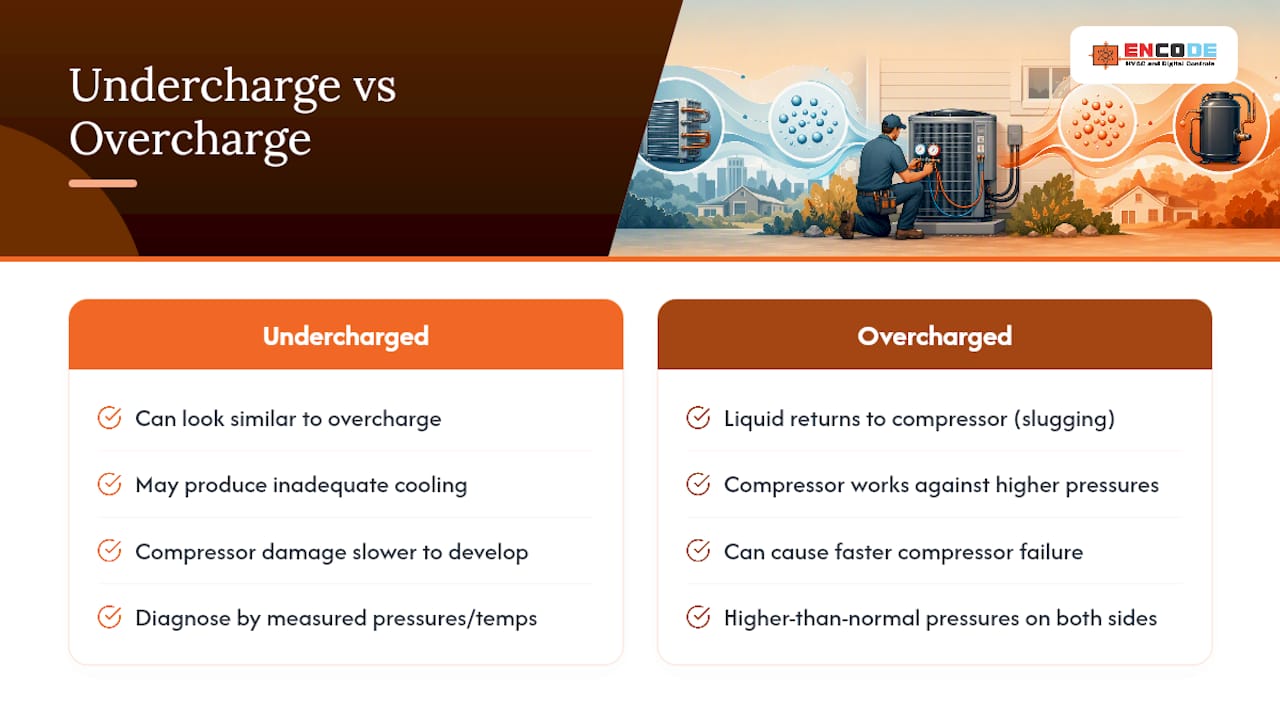
Refrigerant charge is one of those areas where more isn't better. An overcharged system causes its own distinct set of cooling problems, and they can look confusingly similar to an undercharged one from a homeowner's perspective.
Too much refrigerant in the system means the compressor has to work against higher pressures than it's designed for. Liquid refrigerant can end up returning to the compressor instead of fully evaporating in the coil first, a condition technicians call slugging. That's mechanically damaging over time and can cause a compressor failure much faster than simply running low on charge would.
An overcharged system often shows higher than normal pressures on both the high and low side when a technician connects gauges, which is one reason pressure readings taken with proper gauges matter more than guesswork. You genuinely cannot diagnose overcharge versus undercharge by feel or by how the air seems at a register. Both can produce inadequate cooling, and only measured pressures and temperatures tell you which direction the problem runs.
This is the core reason refrigerant work sits firmly outside DIY territory. Getting the charge exactly right, to the specific weight the manufacturer's data plate calls for, requires an accurate scale, calibrated gauges, and training on how ambient conditions affect the readings. A technician charging "by feel" is one of the more common causes of comeback calls in the industry, and it's avoidable with the right equipment and the right process, run once, correctly.
Role of Drain Line Blockages and Condensate Issues
The condensate drain line rarely gets blamed for a warm house, but it causes more cooling failures than most homeowners realize. As your AC pulls humidity out of the air, that moisture collects on the evaporator coil and drips into a drain pan, then out through a condensate line, usually PVC pipe running to a floor drain or outside the house.
Over a cooling season, that line collects algae, mold, and dust, and it can clog completely. Many systems include a safety float switch in the drain pan specifically designed to shut the entire AC down the moment water backs up, preventing an overflow that would otherwise damage ceilings or flooring below the air handler.
That's the connection homeowners miss: a clogged drain doesn't just risk a water leak. It can be the direct reason the system stopped cooling at all, because the safety switch tripped and shut the compressor down as intended. If your system suddenly stopped running entirely rather than running but blowing warm air, check the drain pan and float switch before assuming a bigger mechanical fault.
Clearing a slow drain line is often as simple as pouring a cup of distilled vinegar into the drain access point every month or two during cooling season, then flushing with water. If the pan is already full or the line is clogged solid, that's a straightforward service call, and a much cheaper one than most of the fixes described earlier in this guide.

Importance of Regular AC Maintenance Schedules
Nearly every failure described in this article shares one root cause: a system that didn't get consistent maintenance. Routine seasonal tune-ups paired with regular filter checks prevent the majority of "running but not cooling" service calls before they ever happen, and the fixes involved are almost always the cheap ones: a filter, a coil cleaning, a capacitor caught before it fails completely.
A seasonal tune-up typically includes checking refrigerant pressures and the supply/return temperature split, cleaning the condenser coil, testing capacitor and contactor health, verifying the condensate drain flows freely, and inspecting electrical connections for wear. Catching a capacitor that's testing weak but hasn't failed yet, for instance, turns a future emergency no-cooling call into a $20 part swapped during a scheduled visit.
Filter changes matter more during peak season than people expect. A filter that's fine in April can be fully clogged by July if the system runs constantly. Building a habit around a regular servicing cadence rather than waiting for a breakdown is consistently the cheapest way to keep a system running at its rated capacity for its full expected lifespan.
Author Perspective: Quick Prioritization and Prevention
Homeowners tend to jump straight to worrying about refrigerant or the compressor, when the free checks solve most cases first. Start with what costs nothing and carries zero risk: thermostat settings, the filter, and a look at the outdoor unit. Those three checks resolve a large share of calls before any tool comes out of a truck.
The pattern worth internalizing isn't a specific fix. It's that almost every expensive repair in this guide started as a cheap, ignorable warning sign months earlier. A dirty filter, a capacitor testing weak, a drain line running slow. Building a seasonal maintenance habit is the actual solution here, not any single trick.
— Daniel
Encode Corporation: Repair, Maintenance Plans, and How to Request Service
Working through this checklist gets most homeowners partway there, but a frozen coil that keeps returning, a humming compressor, or pressures that need actual gauges are jobs for a licensed technician. That's where Encode Corporation comes in as a direct next step rather than another guessing game: over 40 years of local HVAC experience means a technician who's already seen your exact symptom pattern hundreds of times before.

A local HVAC company handles residential AC repair, emergency same-day service, and ongoing maintenance plans built around the checks covered above, filter cadence, coil cleaning, electrical component testing, and refrigerant charge verification. When you call or book online, have your system's model number, how long the problem has been happening, and which checks you've already run ready to go. It shortens the visit and often the bill.
Ready to stop guessing? Book residential HVAC service in Billings and get a technician out to diagnose the actual cause, not just the symptom.
Sources
- AC Not Cooling: Troubleshooting Central Air From the Thermostat to the Compressor | ServiceMag
- AC Blows Warm Air: Diagnostic checklist & repair steps | InspectAPedia
- Why Is My AC Not Blowing Cold Air? 7 Common Causes | Carrier
- Why air conditioner blows hot air and how to fix it | Hunker